Peel And Stick Bathroom Floor
Peel And Stick Bathroom Floor
Have you ever started a DIY project that you thought would be a piece of cake, only to later think to yourself, "Gosh, why didn't someone tell me [fill in the blank] before I started?!" I've been there — and today I'm going to tell you everything you need to know before using peel and stick vinyl tile.
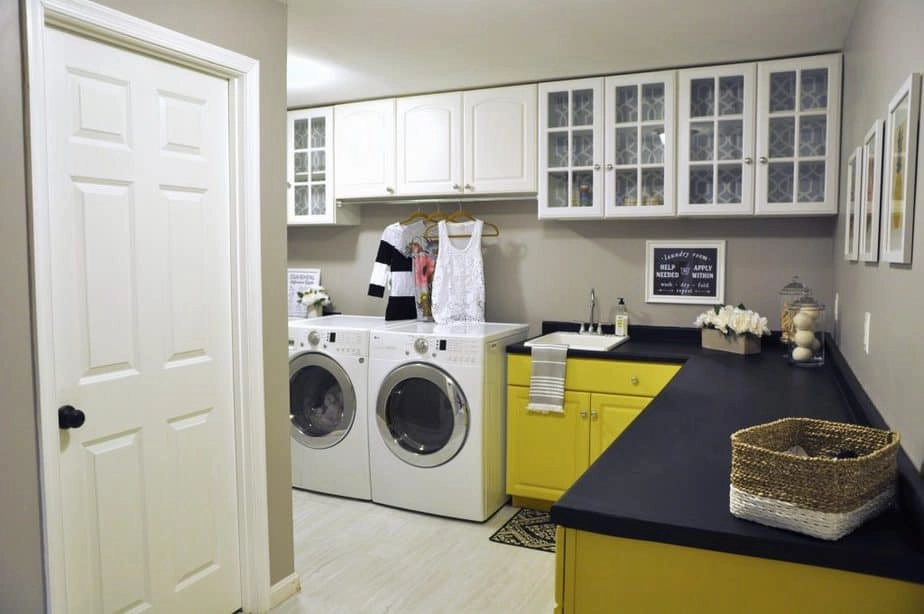
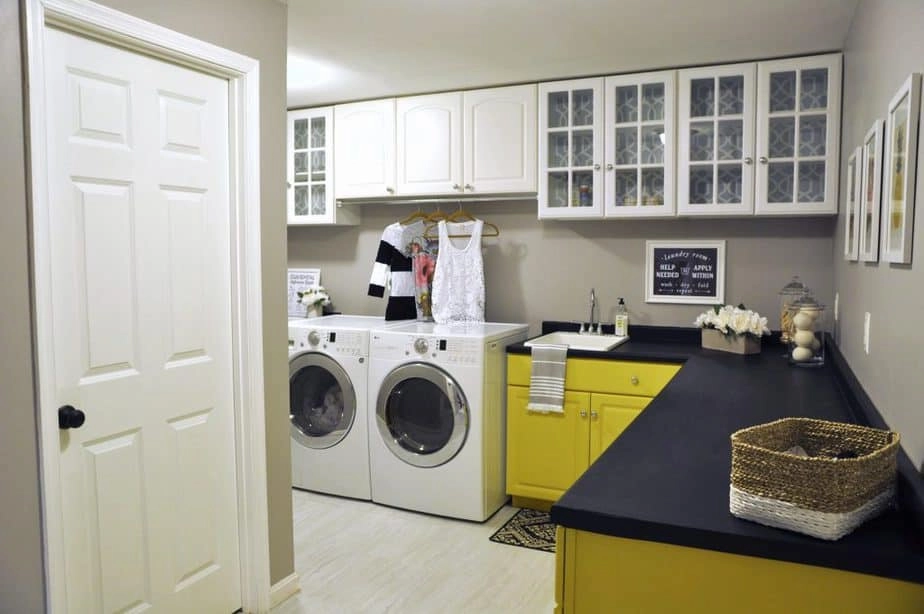
Don't get me wrong: I'm happy with the results in our newly made over laundry room (you can check out the whole DIY laundry room makeover right over here).
My peel-and-stick floor tile looks SO MUCH BETTER than the ugly, outdated linoleum we've lived with for almost three years. Check it out below.
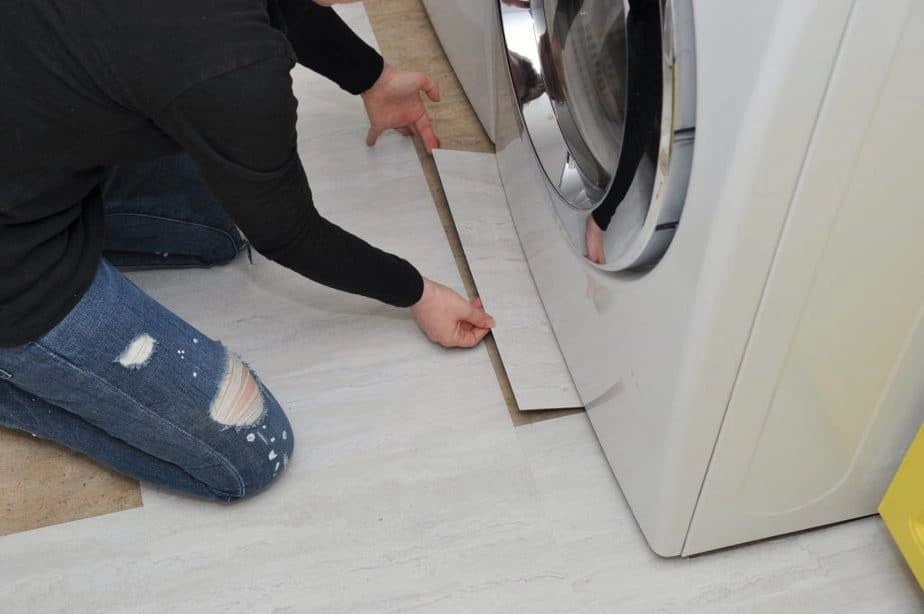
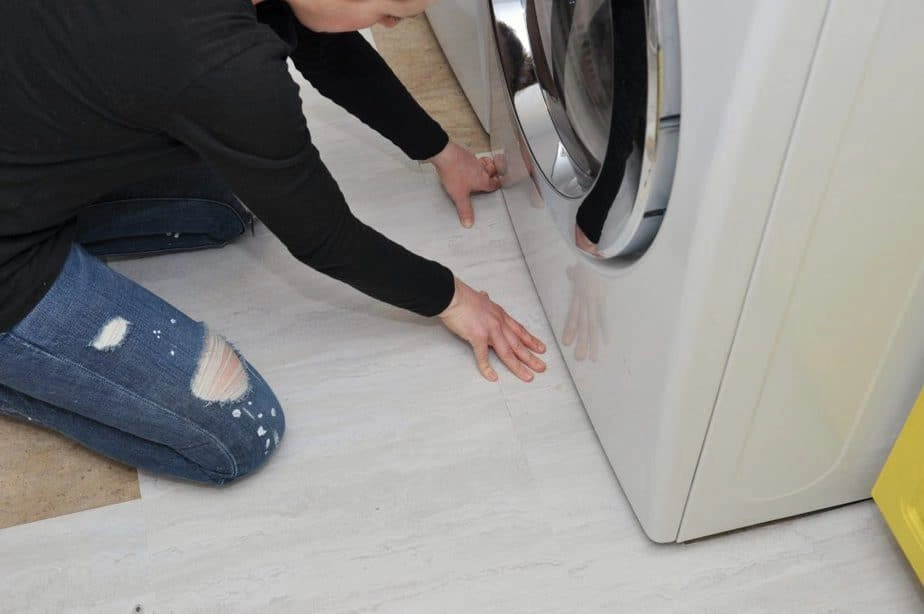
And I'm happy to share that the installation is straightforward — measure and cut each tile, peel off the paper backing, and press it onto the floor.
But if you've ever thought about using peel-and-stick floor tile and want to know some of the key considerations you should weigh before deciding whether it's the right choice for your project, then read on.
- Related post: The prettiest peel-and-stick vinyl floor tile projects on Pinterest
- Related post: Before and after: Our $200 laundry room makeover
- Related post: How to paint laminate cabinets with chalk paint
This post contains affiliate links. For my full disclosure policy, click here.

3 Things You Need to Know When Using Peel And Stick Floor Tile
(That Home Improvement Store and Manufacturers' Websites Won't Tell You)
Here are three important points (the ones that the home improvement store website won't tell you!) to consider before you commit to using peel-and-stick vinyl floor tile for your next DIY project.
#1: The surface that you're installing the tile over matters.
Yes, it's true that peel-and-stick floor tile can be placed right over linoleum.
However, you'll probably get better results if you install the tile directly over the subfloor or over concrete.
Why is that, you ask? If you're using peel-and-stick tile as a fix to hide old, outdated linoleum like I was, you'll quickly discover once you start laying your tiles that the old linoleum is uneven, and perhaps even has nicks or bubbles in some places.
But guess what? Unless you're a professional you won't detect those imperfections until you actually start your tiling.
Personally, I think peel-and-stick vinyl tile is a good flooring choice for a mudroom or utility closet that doesn't yet have existing tile, laminate or hardwood — laying this over concrete would really be ideal.
If you have linoleum in your space already, know it was installed post-1980, and are feeling ambitious, you might consider using a handheld sheet sander (I know that sounds scary, but I promise you it's not!) like this one to get the old flooring as smooth as possible before beginning your project. (Our home was built in 1985 and the flooring in the laundry room wasn't original.) I wish I had known this sanding trick before I started my tiling project, because I think I would have gotten an even better end result had I used a sheet sander.
That said, before you decide to sand —and no matter when your floors were installed and what material they are — please consult a professional to determine whether sanding your flooring is safe for your particular home.
You should proceed with caution, especially if your home was built before the 1980s and there's a chance that your flooring could have asbestos in it. Asbestos is an incredibly harmful material that was used in building materials — including floor tiles — before 1980, but was later banned because of the associated health risks.
If you don't know what your flooring is made of, or if you already know your flooring contains asbestos, DO NOT SAND THE FLOORING. Instead, consult with a professional first — you two should then jointly determine the safest next steps for updating your flooring.
#2: The size and shape of your room also matters.
What type of space are you planning to use the tiles in? A small, square utility closet or mudroom? Your foyer? A bathroom?
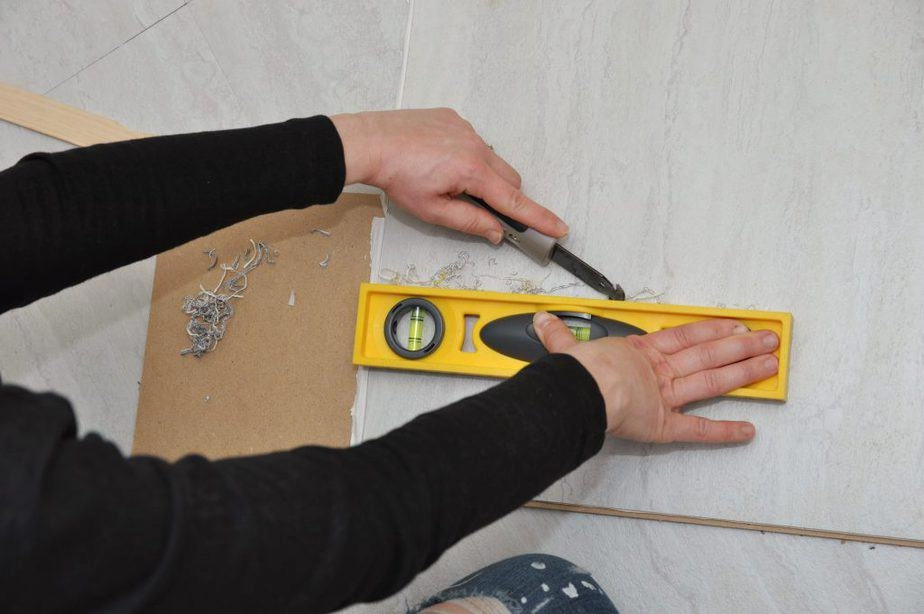
Peel-and-stick vinyl floor tiles work well in square or rectangular spaces where the only tile cutting required will be scoring them in straight lines.
These tiles are pretty durable, I must say, but you do need to handle them with care, and making too many cuts — or making cuts that aren't angular — can cause them to snap in half if you're not careful.
Think about the size and shape of the room you want to tile and take a look at other elements you might need to work around, such as already installed cabinets, moldings, coat closets, floor vents or staircases.
#3: Think about any items you might need to cut around in that room, such as molding or a staircase or the curved base of a toilet.
Making sophisticated cuts to the individual tile pieces — like the ones that might be required if you have to account for molding or a curved toilet base — aside from simply scoring them in a straight line can get tricky.
This is probably my biggest gripe about using peel-and-stick tile that I wish someone had told me before I started this project.
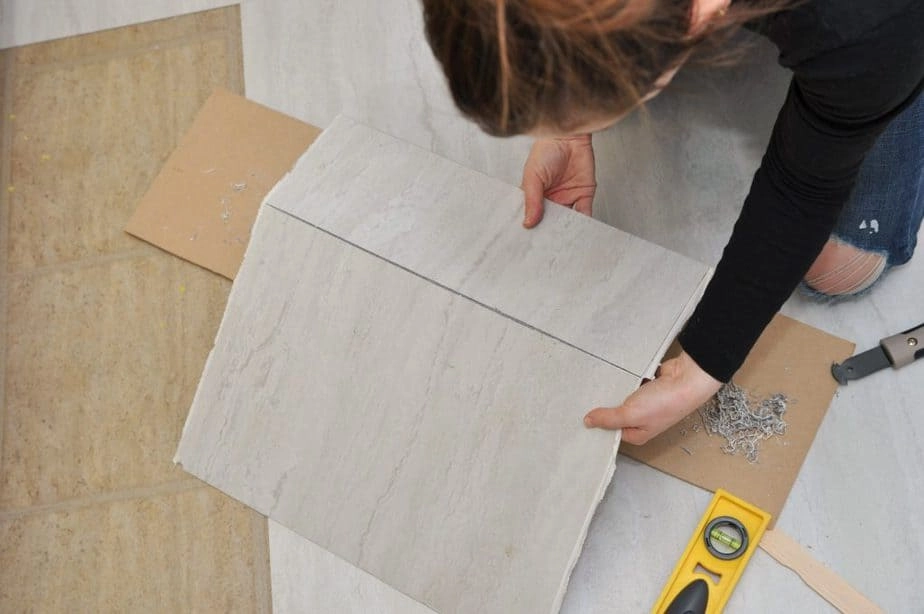
Vinyl tile is definitely durable but it obviously doesn't have the same weight to it as a ceramic tile, laminate or hardwood does, so making cuts that are done in anything BUT a 90 or 180-degree angle is tough.
I definitely ruined several tiles by trying to account for the rounded edges of molding where our door frames meet the floor.
My cuts would end up being jagged or uneven, or I'd accidentally snap a tile in half while trying to, for example, cut an L-shaped tile to fit around a corner of my laundry room.
Even after scoring my vinyl tile, I had to very carefully snap a single piece of tile into two.
Take a look:
Aside from the basic facts about peel-and-stick vinyl floor tile that you can get from any home improvement store website, these are my "I tried it" secrets that I'm sharing that will hopefully help inform your decision about whether peel-and-stick vinyl floor tile is right for you.
A Few More "Nice to Knows" When Using Peel-and-Stick Vinyl Floor Tile
And because I love you guys so much, I'm going to share a couple more "nice to knows" with you about using peel-and-stick vinyl floor tile. (Bonus!)
- Buy more than you think you'll need. As with most flooring projects, you should buy a few more tiles than you think you'll actually use to account for broken tiles, adhesion problems, and so on. The nice thing about most peel-and-stick vinyl tile is that each tile is sold individually, so there's no need to buy an entire box when you only need a handful of extra tiles. And if you end up buying too much you can always return the individual tiles that you don't end up using.
- Store your tiles at room temperature. Definitely didn't see this one coming. After purchasing a second batch of tiles mid-way through the project at my local Lowe's, I accidentally left them in my trunk overnight. When I remembered the next morning that I needed to get the tiles out of the car, I had to let them sit in my basement and warm up for a few hours before I could get to work. One thing I noticed about them even after they had warmed up is that the adhesive wasn't as sticky as usual after I had peeled off the backing of a few of the tiles that were left out in the cold, which I attributed to the swing in temperature. So moral of the story: Don't leave these guys in your car.
- Expect to hear a crunching sound for a week or so after you've installed your tile. Yep, the guy at Lowe's neglected to mention this, and I nearly freaked out when I heard a horrible crunching noise as I walked through the laundry room on my newly installed tile. (One thing to note is that I did not use any extra adhesive beyond what was already on the back of each tile, so I can't speak to whether the tile still makes a crunching sound after installation if you've used additional adhesive.)Thankfully, the crunching went away about a week after I finished the project. Apparently there is a period of time during which the tile settles, so just know that this is normal and that it will go away. Thank goodness, because I would have been seriously annoyed if I had spent $80 and eight hours of my life laying this tile only to realize it would sound like I was walking on empty potato chip bags every time I ventured into the basement to fold towels. Phew.
The Bottom Line
The million-dollar question is: "Is peel-and-stick floor tile a good choice?"
The answer: It depends on your project.
There are plenty of pros to using peel-and-stick vinyl floor tile: It's affordable, comes in an array of colors and patterns that tend to resemble actual ceramic tile or hardwood, and it can be installed over many existing surfaces like linoleum, cutting down on the time and mess required for a demolition phase.
If I had to tackle my laundry room flooring project all over again, I would still use peel-and-stick vinyl flooring — so far, it's proved to be a good choice for our budget and this particular project.
But as the saying goes, "The more you know….." And it would've been great if I had known everything I shared above before starting my tiling.
Have you used peel-and-stick vinyl flooring for a recent project? If so, what were your thoughts?

Source: https://www.katedecorates.co/easy-diy/consider-peel-and-stick-vinyl-floor-tile-diy/


Tidak ada komentar:
Tulis komentar